So the bulb has been changed and you’re still in the dark. Naturally, you run over the usual scenarios to figure it out. You check to see if the circuit breaker at the switchboard is in the on position – it is – so what’s next? As a final check, you guess it might be the light switch itself. Switches should remain maintenance free for many years. When they do fail there’s a couple of things you can test and change to see if this fixes the problem. Quick Spark provides a step by step guide below but we strongly recommend you ask the cons if you’re not confident in doing a new light switch installation yourself. Here’s a step by step guide to changing the faulty light switch yourself:
Step-1
Always turn off the power to the switchboard before start working on any electrical repair. If you can find the specific circuit breaker to the light switch, turn it off else turn off the main power switch and make sure you have cut the circuit. For safety, please also lock it up to keep others from turning it on, this is especially important for your safety while you work on the faulty switch.
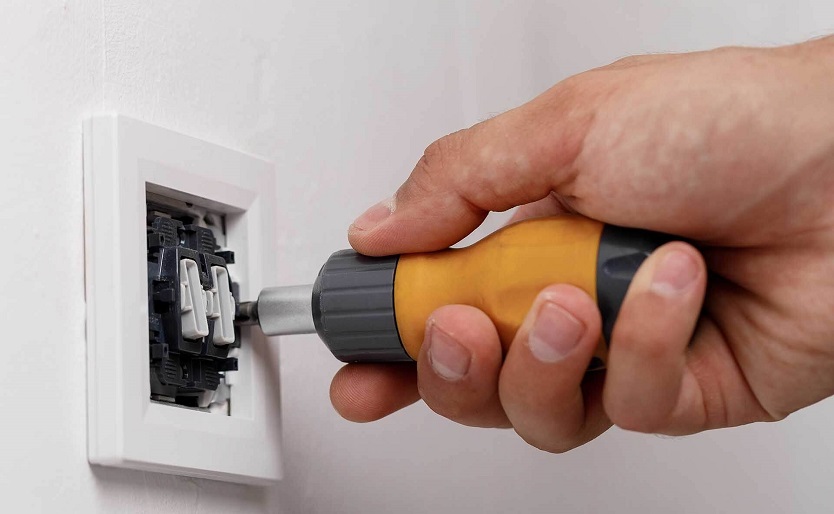
Step-2
Take a flathead screwdriver and remove the screws holding the cover plate on the light switch. Next, take a Phillips head screwdriver and loosen the mounting screws at the top and bottom of the switch. Carefully pull the switch out of the switch box to expose the wire terminals. Take a photograph with your phone for later reference. When reinstalling the wiring, you may need to refer to this photo to make sure the terminals are reconnected in the correct sequence. The correct sequence is to connect the correct colour wire to the specific terminal.
Step-3
Loosen the terminal screws with a Phillips-head screwdriver and remove the wires from the terminals. We’ve separated this out because it’s a vital part of the process sequence and independent of the setup described in Step 2.
Step-4
Next step is to determine if an electric path can be established between two points. To do this, you’ll need a basic continuity tester or a continuity function on your multimeter. Ensure the switch is off and touch both the wire terminals with the tester. The tester should not make any sound or the light on the tester should not come on. Then turn on the switch and repeat the procedure. The switch works fine if the continuity tester lights up or the multimeter makes a sound.
Step-5
The final step is to test the switch with a multimeter. Firstly, turn off the switch and touch one probe to each hot terminal and check whether the reading shows infinity. Next, turn the switch on and repeat the procedure. Good switches will always show a reading zero or close to it when it is ON. Replace the faulty switches that show infinity in ON position.
This concludes our step by step guide to repairing a faulty light switch. Once again though take extreme care when dealing with electricity. The dangers are well known and mistakes can be fatal.
You can contact us if this guide was not helpful. Quickspark’s electricians are highly qualified and experienced to handle all types of electrical issues. Just give us a call on 1300 265 751, and we can fix it for you.