They say, “Don’t play with the fire,” and not paying attention to the electrical faults in your home is exactly the same. The circuit breaker in your home is like the “head” of the electrical supply. A broken circuit breaker may cause electrical overload in your house. Ultimately, this overload can lead to short-circuiting and trigger a fire. So, does that mean you have to keep calling an electrician to make sure that the circuit breaker in your home is working fine?
Well, the good news is, you can do that on your own with the help of a multimeter. Quick Spark cares for your safety and your hard-earned money. We have made a step by step guide to testing your circuit breaker with the help of a multimeter. Let’s begin.
Tools You Will Need For Testing A Circuit Breaker
Here are two essential tools you will need to conduct the test
- Flathead Screwdriver that you will use to uncover the circuit breaker box.
- Digital multimeter (of any reliable brand).
The selection of the brand is not that important but make sure you have the right setting on your multimeter to avoid breaking it.
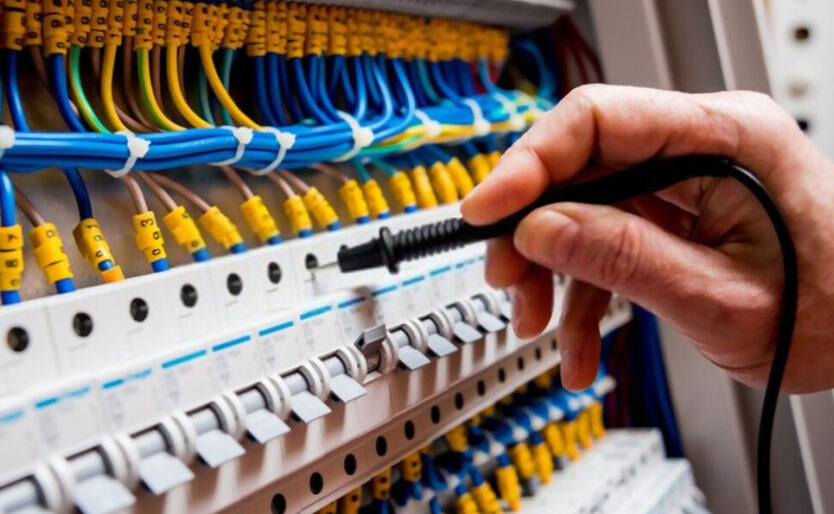
How To Test The Circuit Breaker- Step By Step Guide
Alright, here is something you need to know. You can check your circuit breaker in two ways.
- Voltage testing
- Resistance testing
However, in this article, we will discuss testing the circuit breaker voltage.
Steps To Check Circuit Breaker Voltage
Step 1: Opening The Circuit Breaker
It is time to use that flathead screwdriver to open the circuit breaker cover. You may want to get some help so that it (circuit breaker panel) doesn’t fall while opening.
Step 2: Setting Your Multimeter To AC Voltage
Here is how you do this step;
- Rotating the dial of the multimeter to AC voltage
- Insert the red test lead in voltage socket terminal and black test lead in common socket terminal
It is possible that your multimeter may need an appropriate voltage setting. If it needs setting, rotate the multimeter’s dial to a voltage higher than what you usually have (120V).
Step 3: Circuit Breaker Testing
Testing Single Pole Circuit Breaker
- Put the common or black lead into the breaker panel’s ground.
- Put the red lead into the circuit breaker’s (which you wish to test) hot wire.
For a single-pole circuit breaker, the standard reading is 120V. If the multimeter is showing zero or a lower voltage, it means the circuit breaker is bad, and you need to call an expert electrical service, such as Quick Spark.
Testing Double Pole Circuit Breaker
Insert the black and red lead of the multimeter directly into the breaker terminal. The standard reading for a double pole circuit breaker is 240V (approximately).
Moreover, you have to test both sides of the double circuit pole breaker separately. Just insert the hot lead to one side of the circuit breaker’s terminal, and the common lead to the panel’s ground. Do this with the other side as well.
Ideally, both sides should have 125 volts (or near) each. If the double pole breaker’s other side is showing zero voltage, it means you have a bad circuit breaker that needs replacement.
Testing the circuit breaker is something you can do on your own. However, if there is something wrong, immediately call professional electricians such as Quick Spark. Just give us a call or visit our website https://getquickspark.com.au/ for appointments.